Screenshots are a vital part of our daily digital workflow—whether you’re creating tutorials, reporting software bugs, or sharing quick feedback. For these tasks, annotation becomes essential. That’s where Greenshot comes in. This lightweight, open-source tool goes beyond just taking screenshots—it allows you to capture, mark up, and export visuals with ease.
This guide walks you through everything you need to know about using Greenshot for screen annotation—from installation to advanced tips that save time and elevate your productivity.
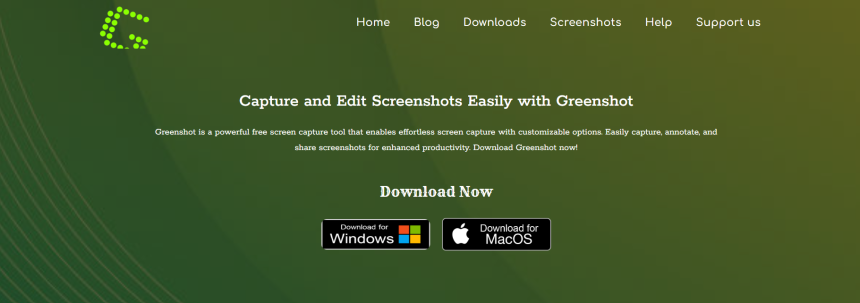
Greenshot Overview: What It Is and Why It Matters
Greenshot is a free and open-source screenshot tool primarily for Windows users. Unlike basic snipping tools, it provides a built-in editor that lets you add text, arrows, highlights, and shapes directly on your captured images. It’s designed to be intuitive, fast, and light on system resources.
Here’s what makes Greenshot a favorite among professionals:
- Custom capture modes (window, region, full screen)
- Instant access to annotation tools
- Integration with tools like MS Office, Jira, and Imgur
- Highly customizable hotkeys and settings
Now, let’s dive into the step-by-step usage and annotation features.
Installation and Initial Setup
Before using Greenshot’s annotation features, you’ll need to install the software. Here’s a quick rundown:
Download Greenshot
Visit the official site getgreenshot.net and download the Windows installer.
Install the software
Run the installer, agree to the terms, and choose your setup options. By default, it will start automatically with Windows.
Configure basic settings
Right-click the system tray icon > Preferences. Set your preferred output folder, image format (PNG or JPG), and hotkeys.
Once set up, Greenshot will reside in your system tray, waiting for you to capture and annotate.
Capturing Screens for Annotation
Greenshot gives you multiple ways to take screenshots:
- Full screen: Captures your entire display.
- Window capture: Selects and captures a single application window.
- Region capture: Drag to select the specific portion of the screen.
Setting Custom Hotkeys
You can define shortcut keys for each capture mode:
- Press Ctrl + Print Screen for the region
- Use Alt + Print Screen for the window
- The default Print Screen grabs the full screen
Once captured, the image opens automatically in Greenshot’s Image Editor, where all annotation magic happens.
Exploring the Annotation Interface
After taking a screenshot, Greenshot launches its image editor. This is your creative canvas for adding explanations, markings, and visual cues.
Here’s what you’ll find:
- Toolbar (top): All annotation tools like arrow, text box, shapes, highlight, blur, and crop.
- Canvas (center): The screenshot itself w,here all edits happen.
- Properties panel (right): Customize color, line thickness, font, opacity, and more.
Marking Screens with Arrows and Shapes
Arrows are your best friend when pointing out UI elements or steps. With Greenshot, it’s seamless:
Using Arrows
- Click the arrow tool from the toolbar.
- Click and drag on the canvas to draw.
- Adjust thickness, direction, and color from the properties panel.
Adding Shapes
To create emphasis or section off parts:
- Choose the rectangle, ellipse, or line tools.
- Draw over the desired screen region.
- Toggle fill color or border color based on the effect you want.
These visual cues help users instantly locate the key areas without needing lengthy explanations.
Adding Context with Text Boxes
Screenshots become more powerful when paired with context. Greenshot allows you to add text seamlessly.
Adding Text
- Select the text tool (looks like a “T”).
- Click on the image where you want the text.
- Type your message or label.
You can customize:
- Font size and style
- Text color and background
- Alignment and positioning
This is particularly useful for guides, tutorials, or internal bug reporting.
Highlighting and Emphasizing Content
If you want to draw attention to specific content without covering it up, highlighting is your go-to.
- Use the highlight tool to draw translucent blocks over text or UI components.
- Choose the blur tool when you need to obscure sensitive data such as email addresses or passwords.
Both tools offer adjustable opacity so you can control how much of the original screen content is visible.
Cropping and Resizing for Focus
Sometimes a screenshot contains extra space or irrelevant UI elements. Cropping allows you to clean up your image.
- Select the crop tool
- Drag across the area you want to keep
- Hit Enter to trim the rest
This focuses your viewer’s attention and makes the annotation cleaner.
Undo, Redo, and Quick Edits
Mistakes happen. Greenshot makes it easy to:
- Undo with Ctrl + Z
- Redo with Ctrl + Y
- Move elements by clicking and dragging
- Resize annotations by pulling the edges
You can also delete annotations by selecting and pressing the Delete key.
Exporting Your Annotated Screens
Once you’re done annotating, Greenshot gives you several export options:
- Save to file in JPG, PNG, BMP, or GIF
- Copy to clipboard to paste in emails or chat
- Send to the email client directly
- Upload to Imgur or other services
- Send to Microsoft Word, Excel, or PowerPoint
Each method is accessible directly from the File menu or right-click context menu.
Creating Custom Annotation Templates
For professionals who annotate screens regularly—like QA testers, educators, or support agents—templates are a massive time saver.
Greenshot doesn’t have true templates, but you can:
- Create a “base” screenshot with standard elements.
- Save it as a file or project.
- Reopen and modify when needed.
This way, your branding or formatting stays consistent across documentation.
Automating Tasks with External Commands
Advanced users can connect Greenshot to external commands or scripts.
- Go to Preferences > External Commands
- Add scripts that automatically open screenshots in another app (e.g., Photoshop, GIMP)
- Chain commands to auto-upload files to FTP or cloud
This is useful for those in tech-heavy environments or automation workflows.
Integrating with Project Tools
Greenshot integrates easily with project management and communication tools:
- Jira: Use the plugin to attach screenshots to tickets.
- Outlook: Insert images into emails with one click.
- Slack or Teams: Paste annotated screenshots directly into chat via the clipboard.
These integrations make Greenshot a productivity multiplier in collaborative environments.
Saving Time with Keyboard Shortcuts
Speed up your work by memorizing essential shortcuts:
| Action | Shortcut |
| Capture region | Ctrl + Print Screen |
| Capture window | Alt + Print Screen |
| Open the editor with the clipboard | Ctrl + Shift + Print |
| Undo | Ctrl + Z |
| Redo | Ctrl + Y |
| Save file | Ctrl + S |
Custom shortcuts can also be configured under Preferences > Hotkeys.
Best Practices for Clean Annotations
To keep your annotations professional and easy to follow, follow these tips:
- Limit colors: Stick to 2–3 main colors to avoid visual clutter.
- Use arrows consistently: Same size and direction improve readability.
- Label clearly: Use concise text like “Step 1”, “Click Here”, or “Important”.
- Avoid overlapping: Don’t stack elements unless necessary.
Clean, minimal annotations often deliver more impact than overloaded visuals.
Troubleshooting Common Greenshot Issues
Editor Doesn’t Open
- Check if “Open in image editor” is selected in the capture preferences.
- Ensure Greenshot isn’t blocked by antivirus or system policies.
Hotkeys Not Working
- Conflicts may occur with other apps (like OneDrive or Snip & Sketch).
- Go to Preferences > Hotkeys and reassign unique shortcuts.
Cannot Capture Certain Windows
- UWP apps like Windows Store might require running Greenshot as an Administrator.
Conclusion
Greenshot transforms simple screenshots into meaningful visual communication tools. With its versatile annotation features, lightweight design, and seamless integrations, it’s a must-have for anyone who works with visuals regularly.
Whether you’re building training materials, submitting bug reports, or just sharing how-tos with a friend, Greenshot makes it fast and elegant.
Once you get the hang of its tools—arrows, text, highlights, and more—you’ll wonder how you ever annotated screenshots without it.